1) First, go to the Settings section from the Tools menu.
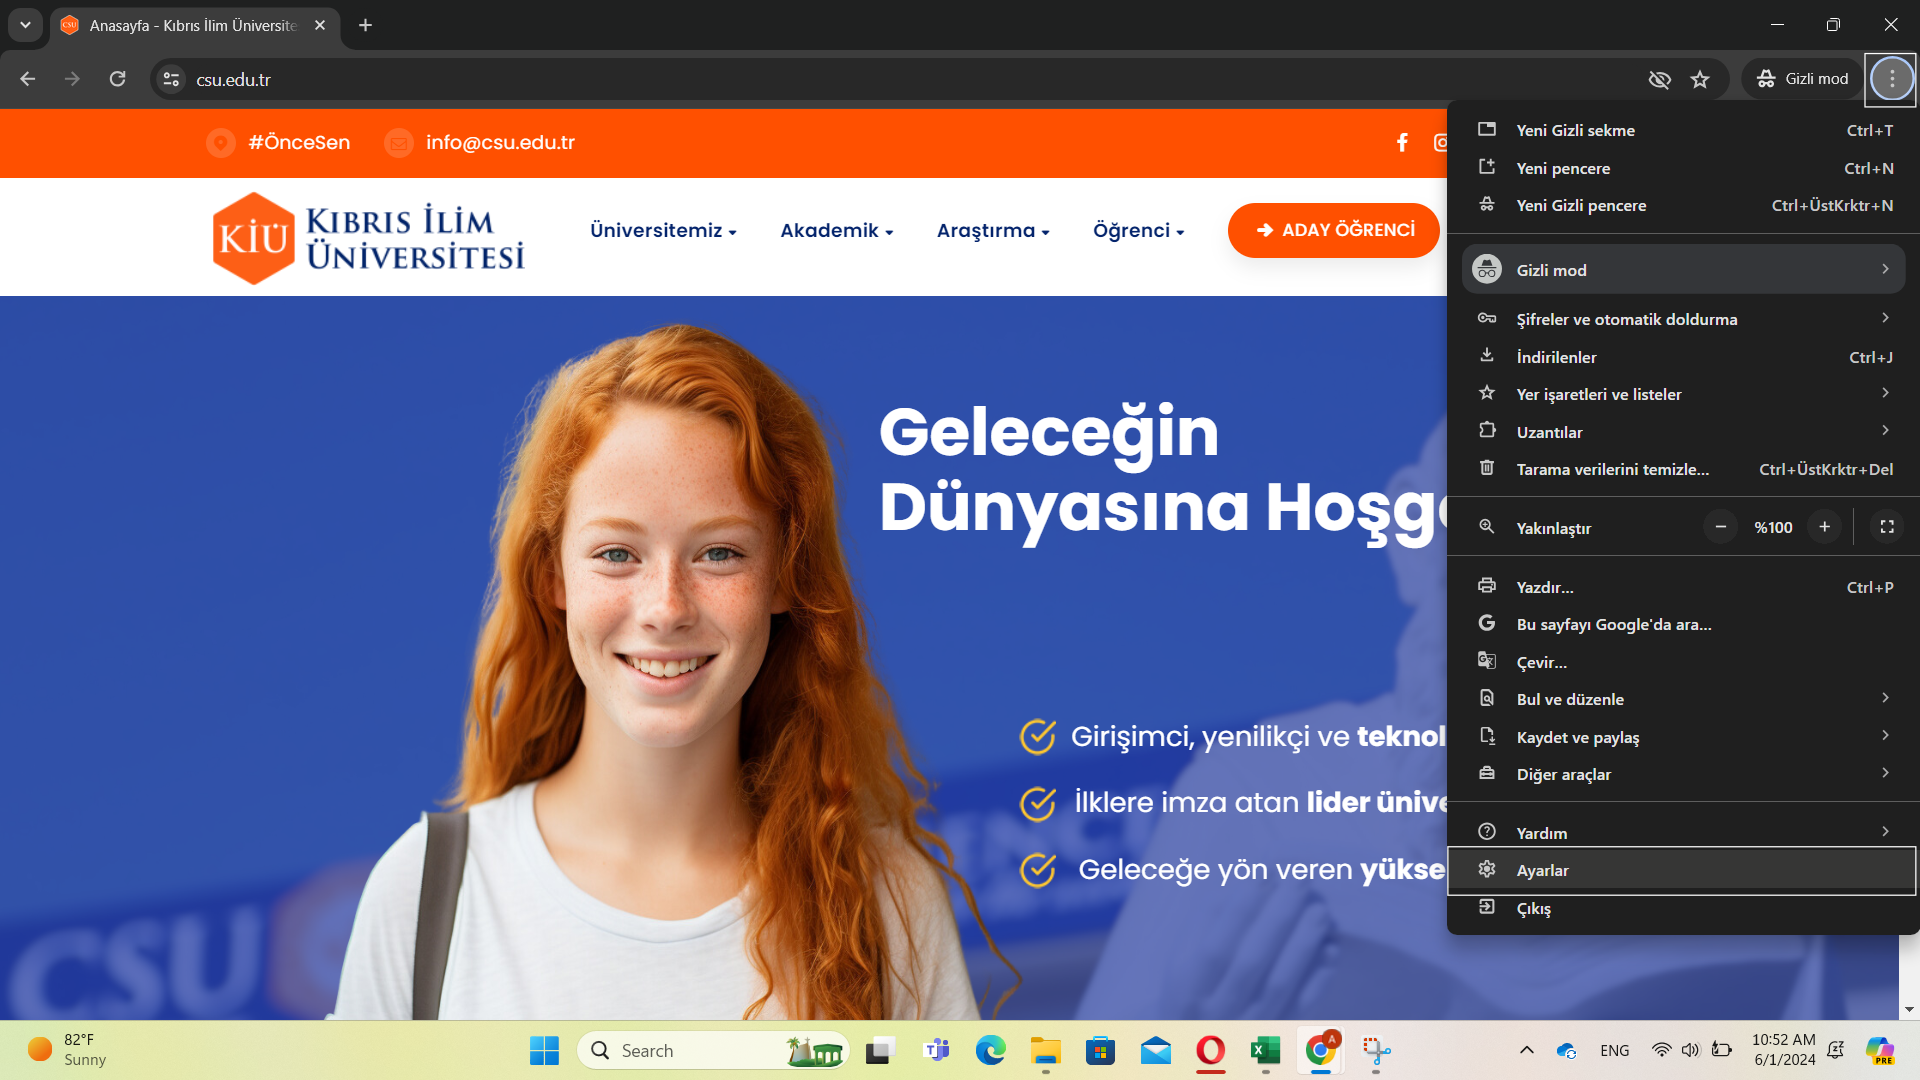
2) Go to proxy settings.
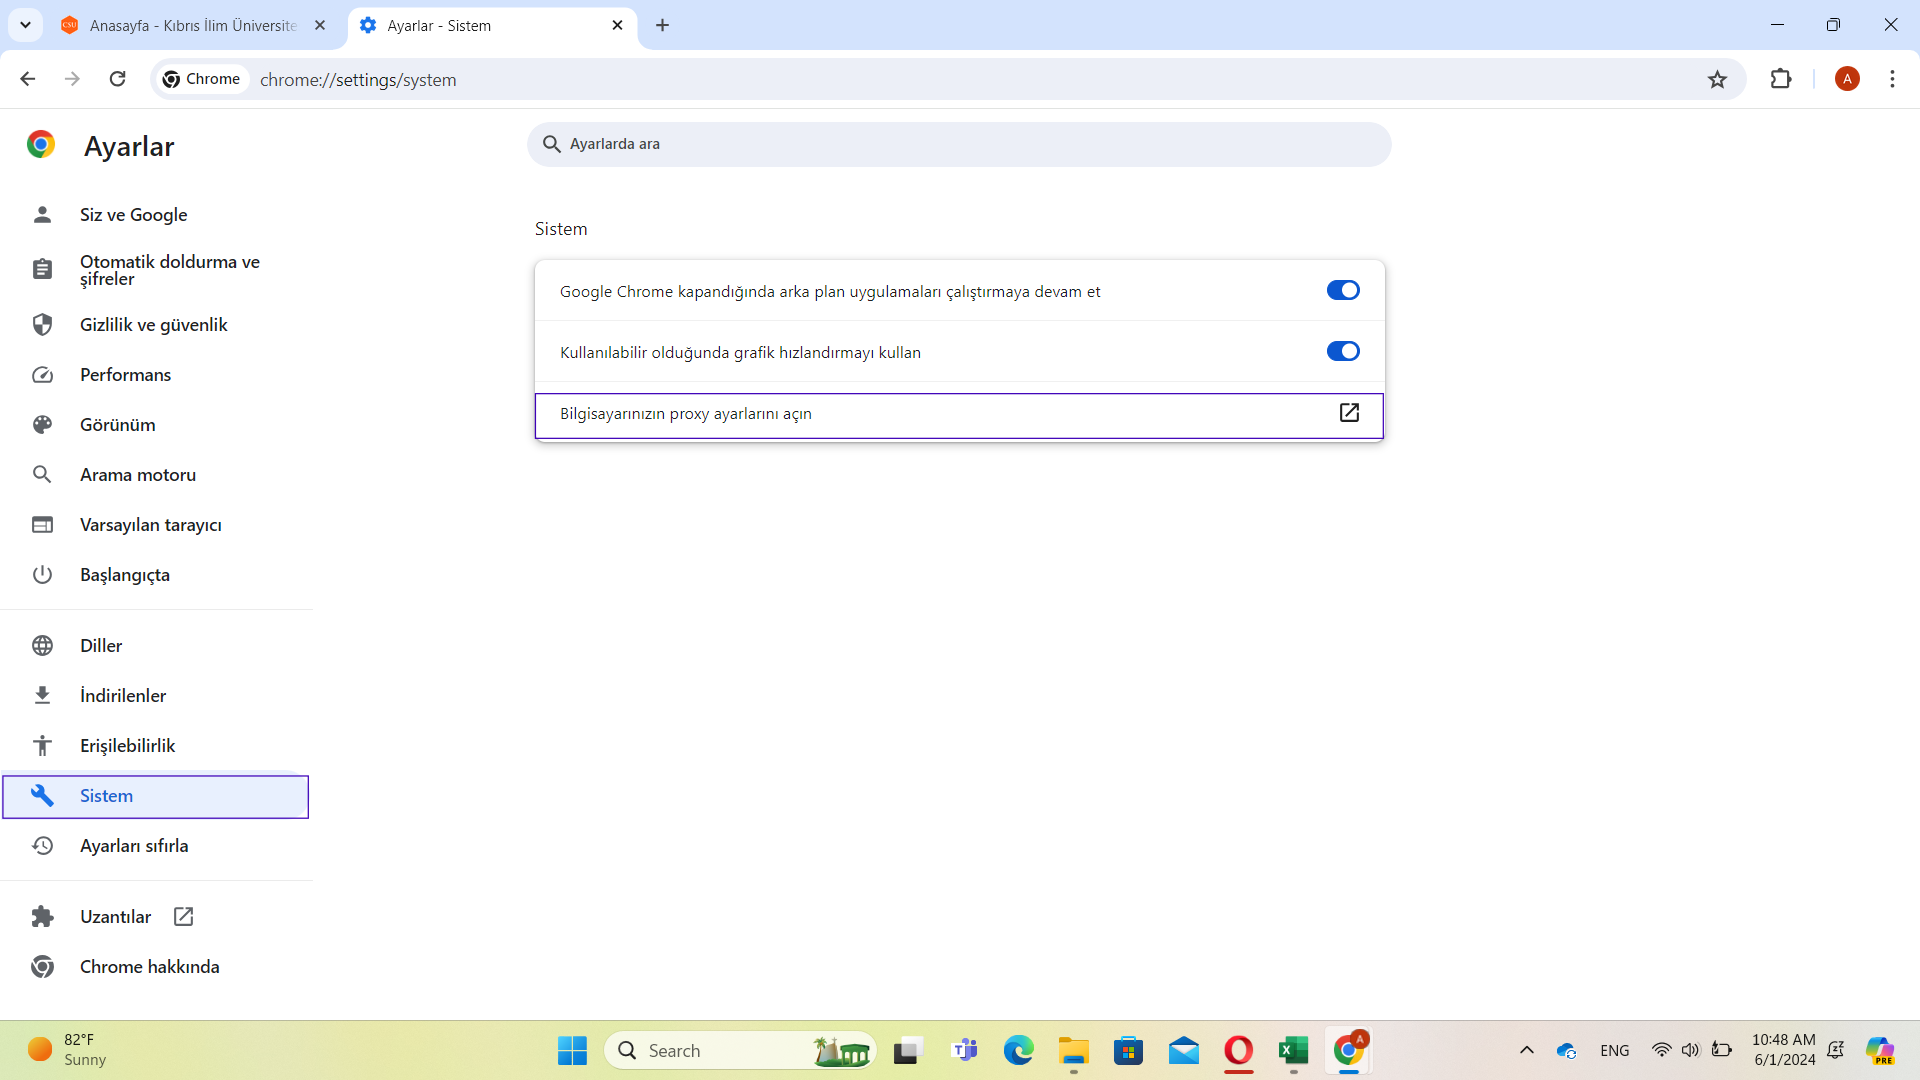
3) Go to Windows Settings.
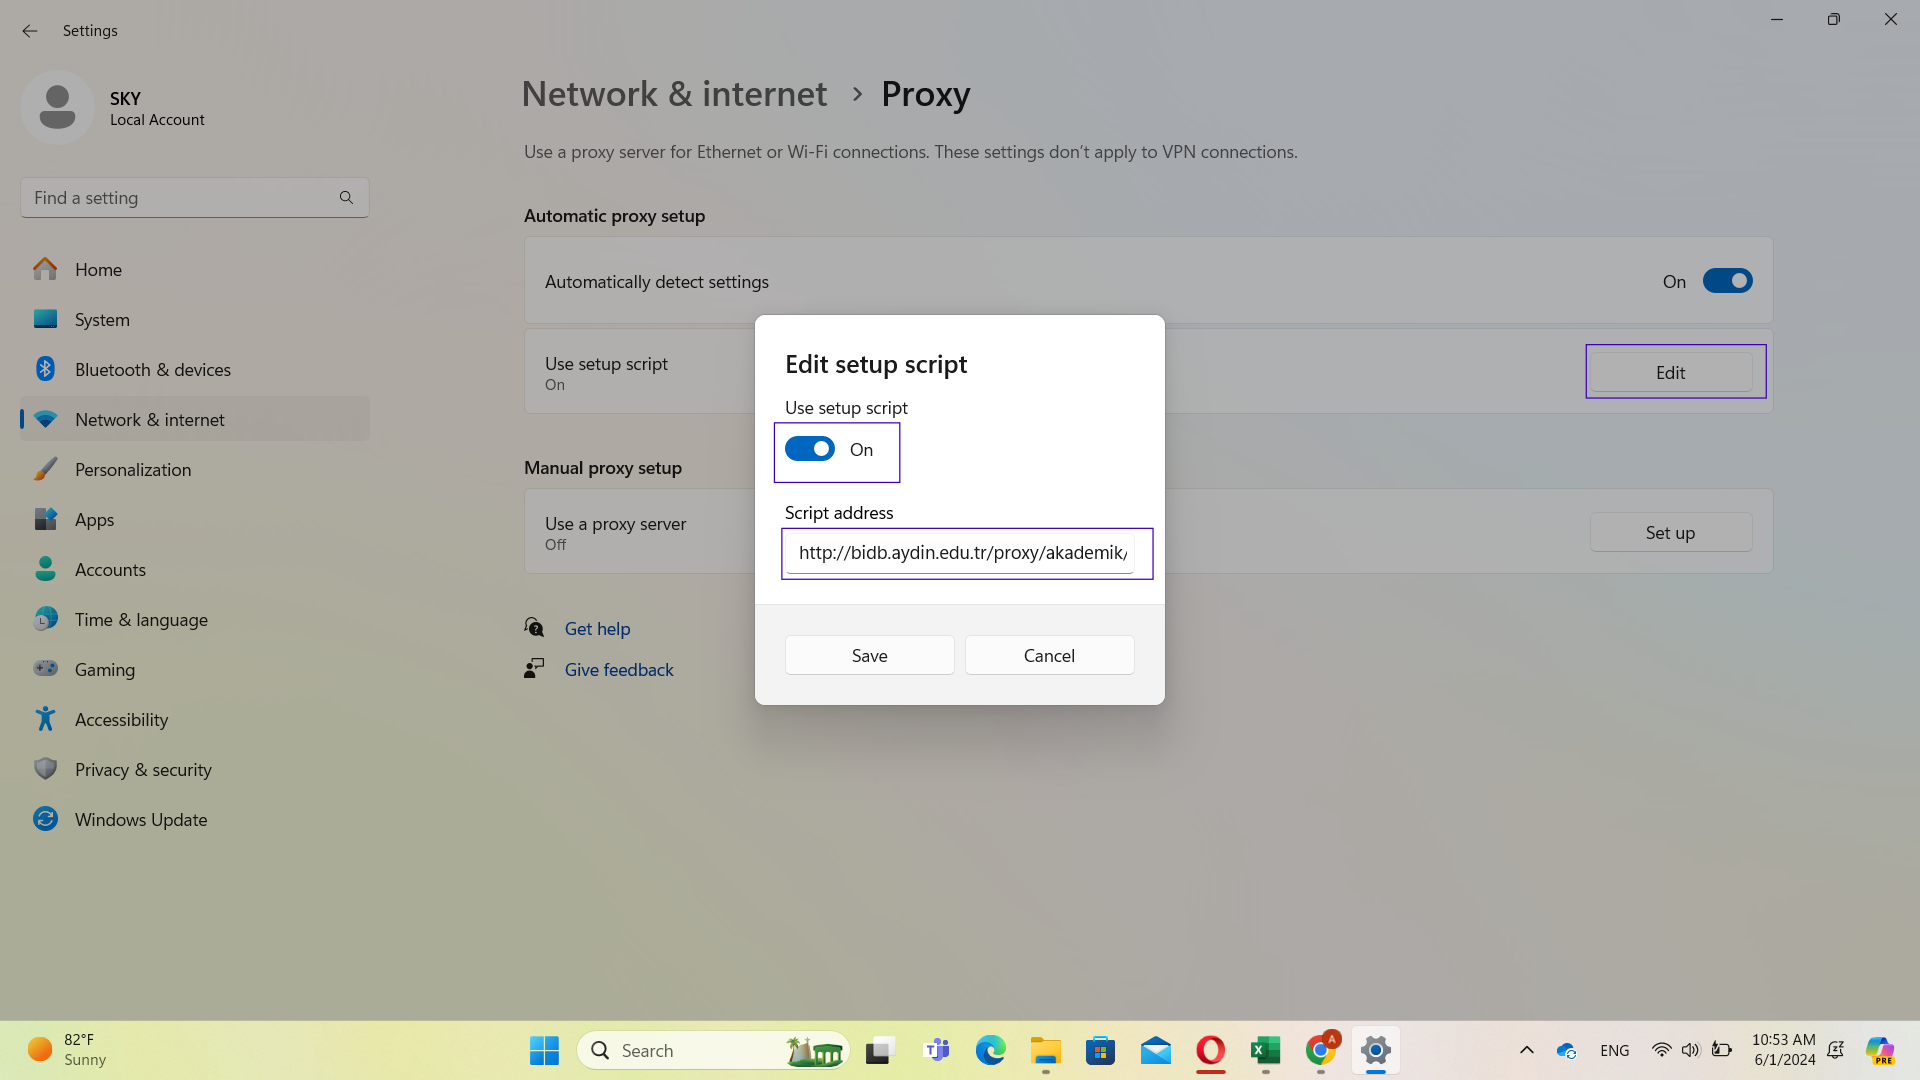
4)We activate the Use Installation Script option.
In the script address section:
For Academic Staff: http://bidb.aydin.edu.tr/proxy/akademik/proxy.pac
For Students: http://bidb.aydin.edu.tr/proxy/ogrenci/proxy.pac
address is entered.
5) You must enter your institutional ([email protected])/student e-mail address ([email protected]) and password on the username and password screen that appears on the screen.
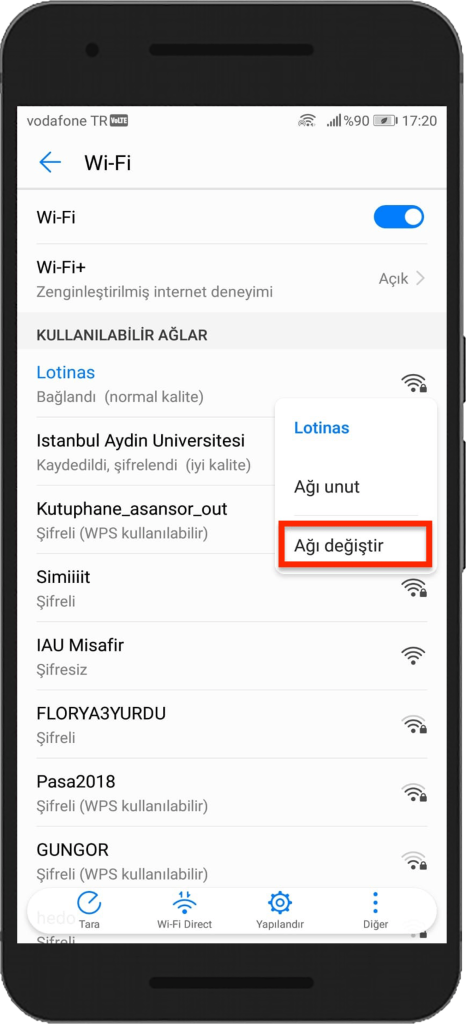
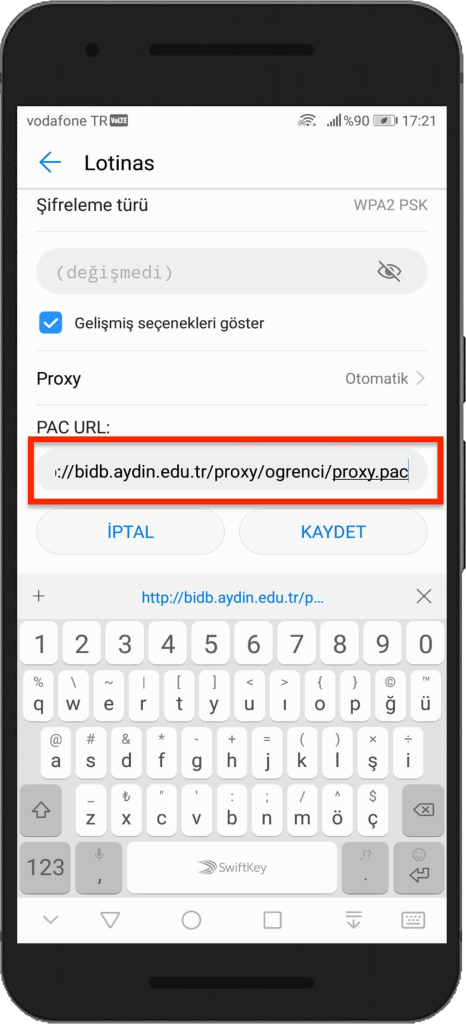
1) Go to Wi-Fi settings from Settings, then click on “change network” for the active network
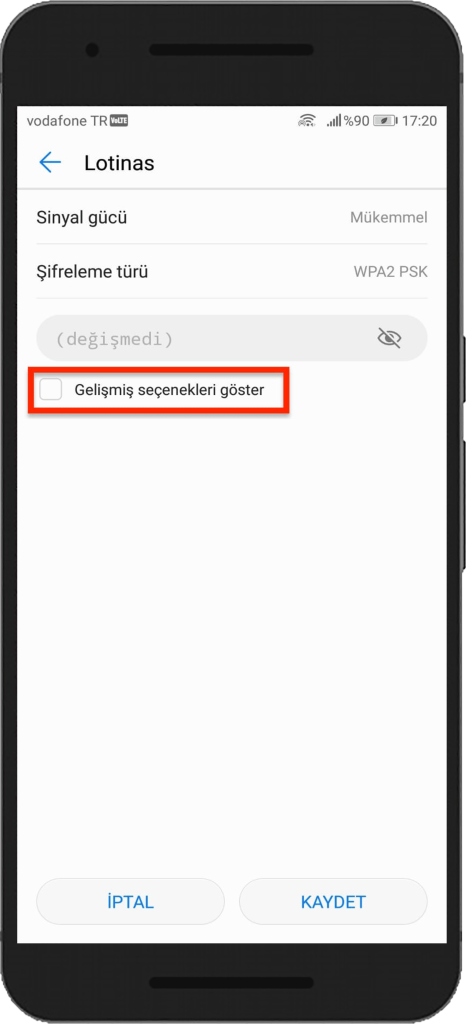
2) Click on the Show advanced options button.
3) The proxy is set to Automatic.
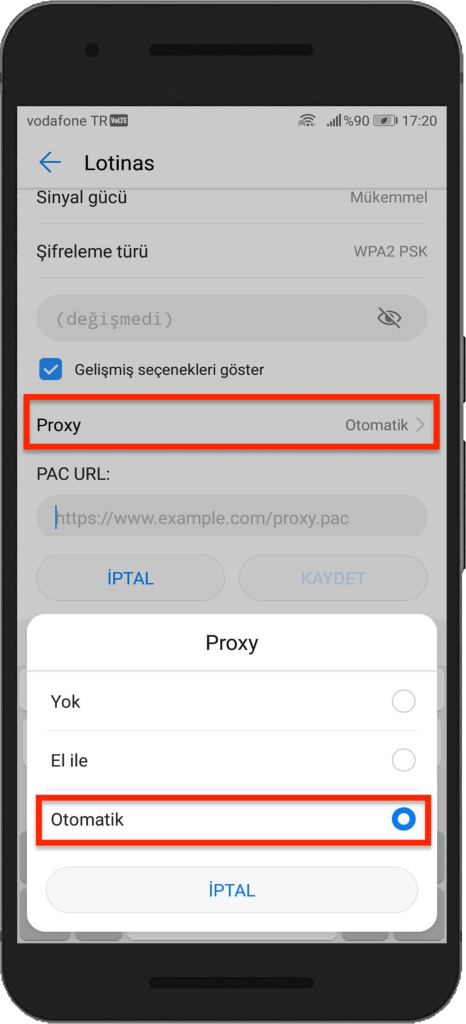
4) In the PAC URL section
If you are a student : http://bidb.aydin.edu.tr/proxy/ogrenci/proxy.pac address
If you are a staff member: http://bidb.aydin.edu.tr/proxy/akademik/proxy.pac address is entered and saved
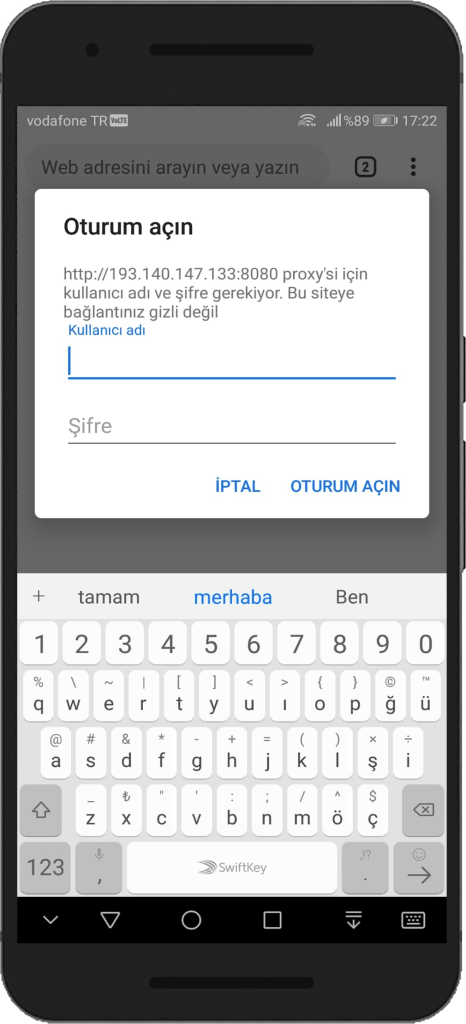
5) You must enter your institutional/student e-mail address and password on the username and password screen that appears on the screen.
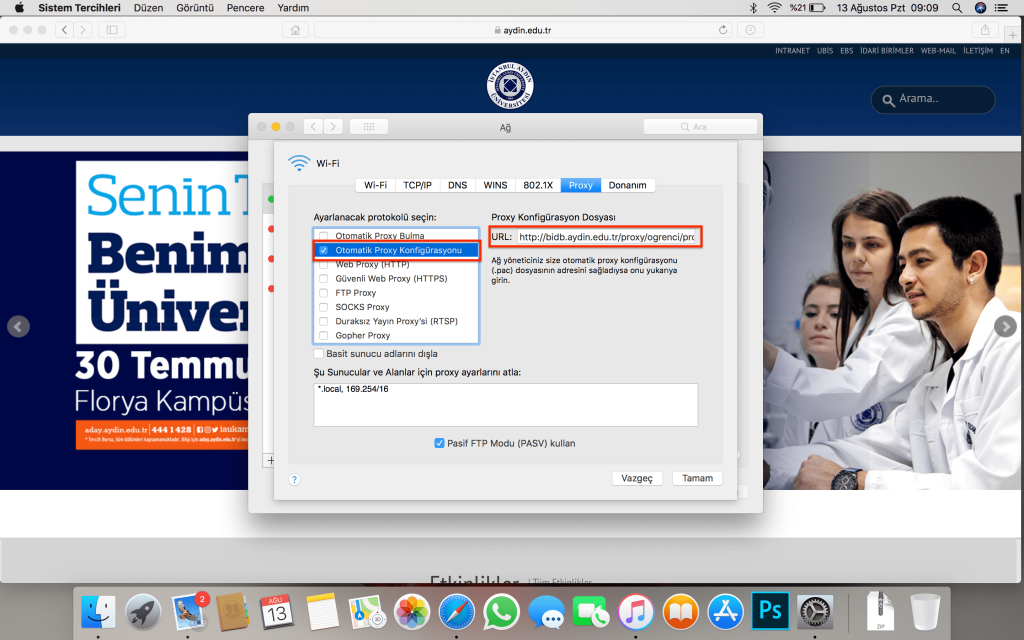
1) First, go to Safari’s Preferences
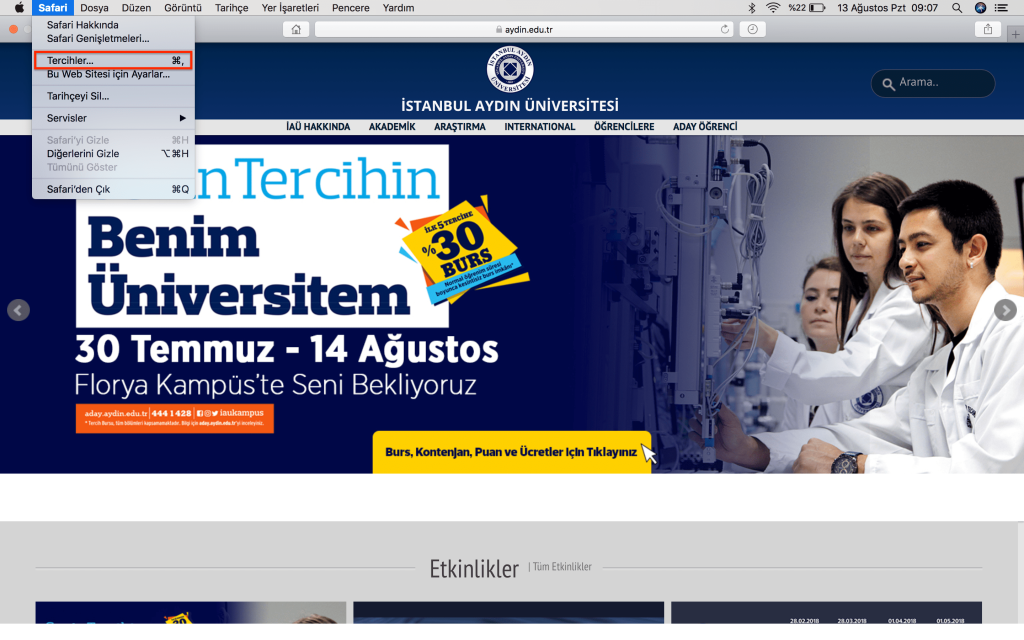
2) Click on Change Proxy Settings on the screen that appears.
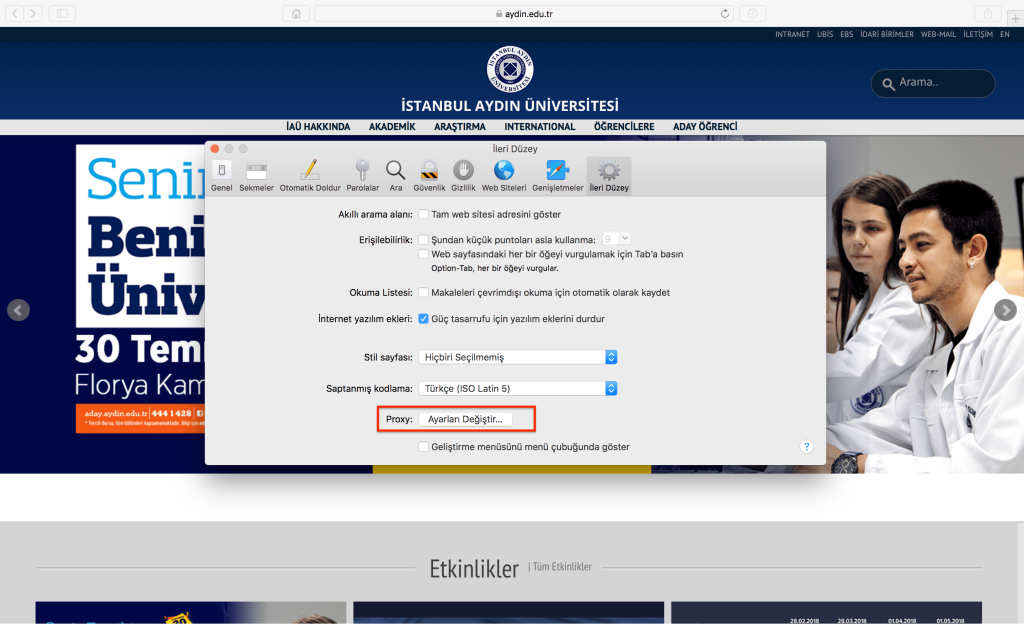
3) In this step, Automatic Proxy Configuration is selected
In the URL section;
For Academic Staff: http://bidb.aydin.edu.tr/proxy/akademik/proxy.pac
For Students: http://bidb.aydin.edu.tr/proxy/ogrenci/proxy.pac address is entered
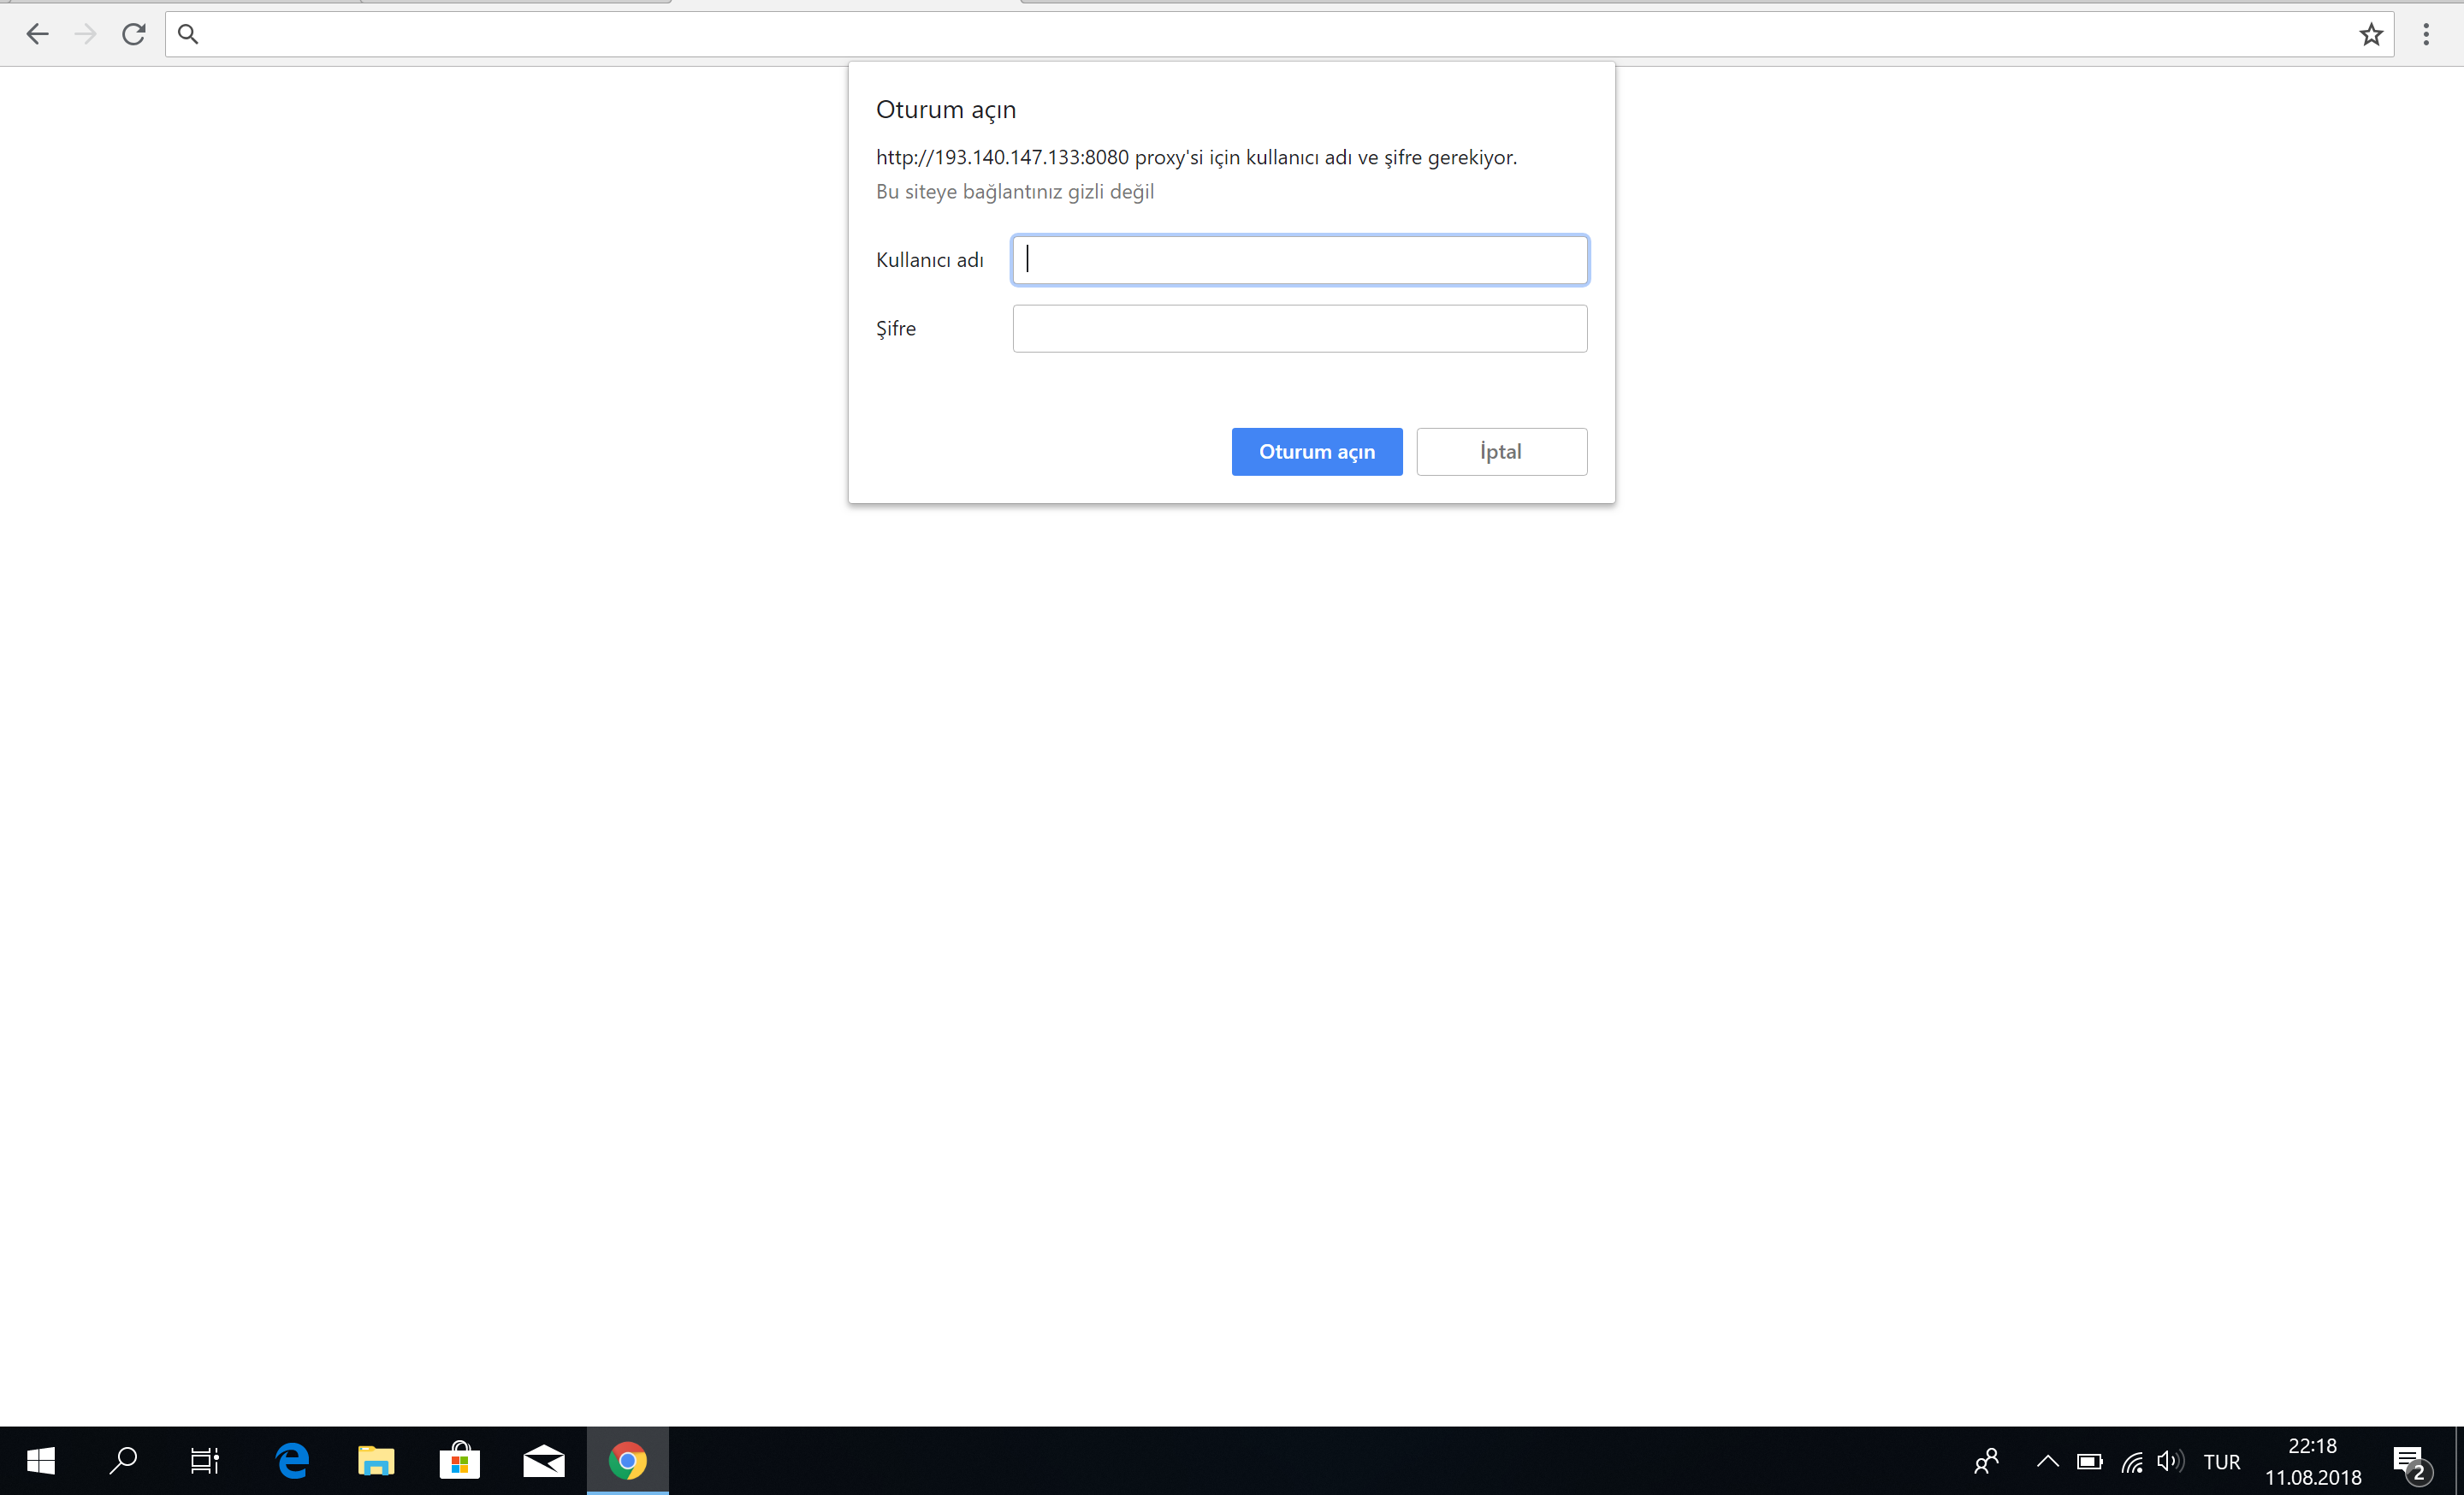
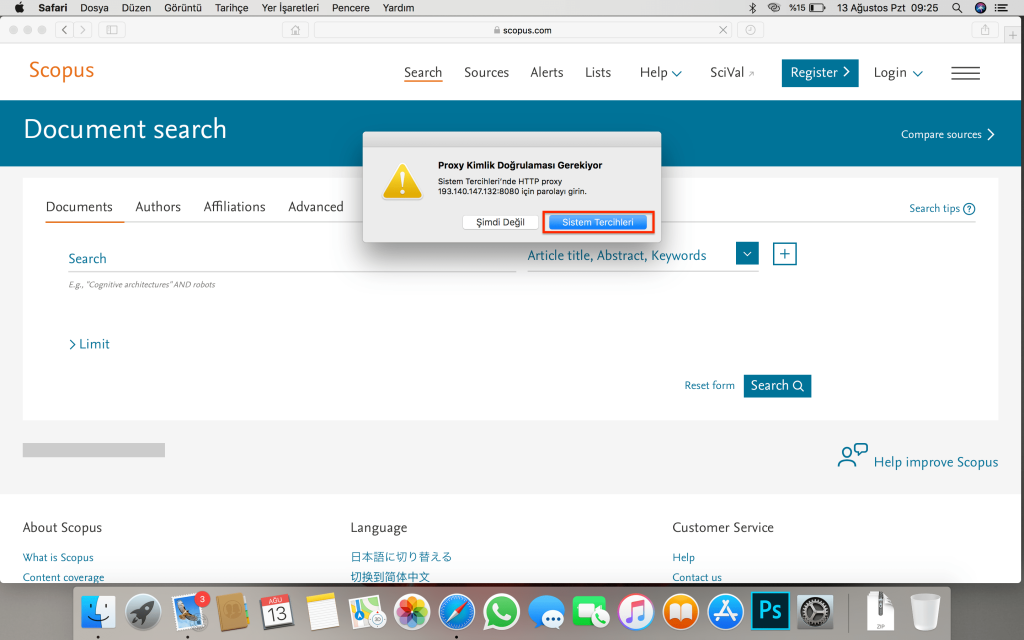
4) After these operations are completed, you will be presented with this page when you want to access any database. You should proceed by clicking on the System Preferences button.
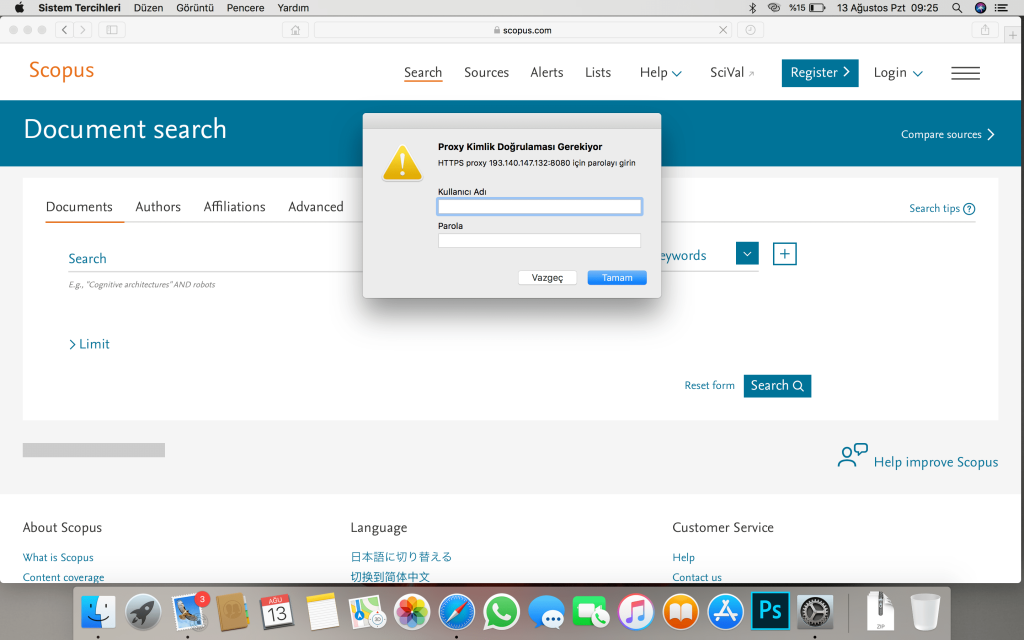
5) You must enter your institutional/student e-mail address and password on the username and password screen that appears on the screen.
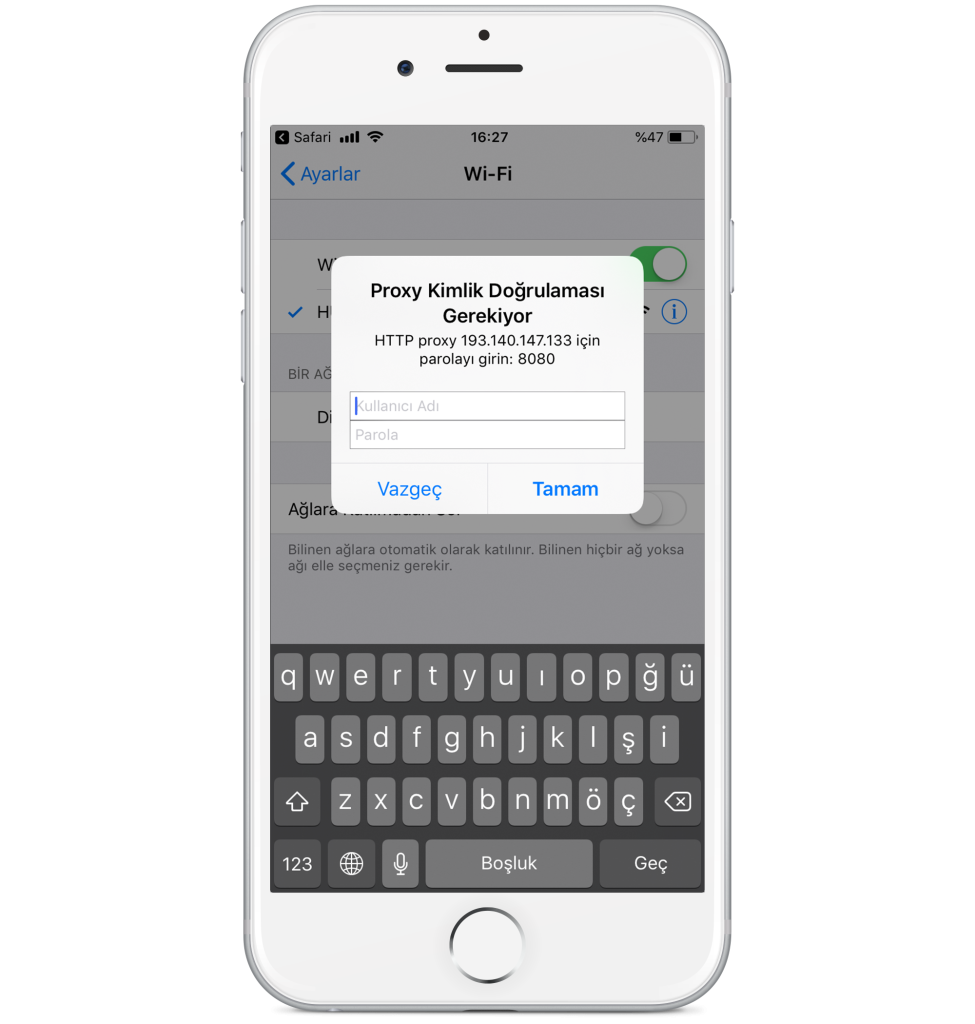
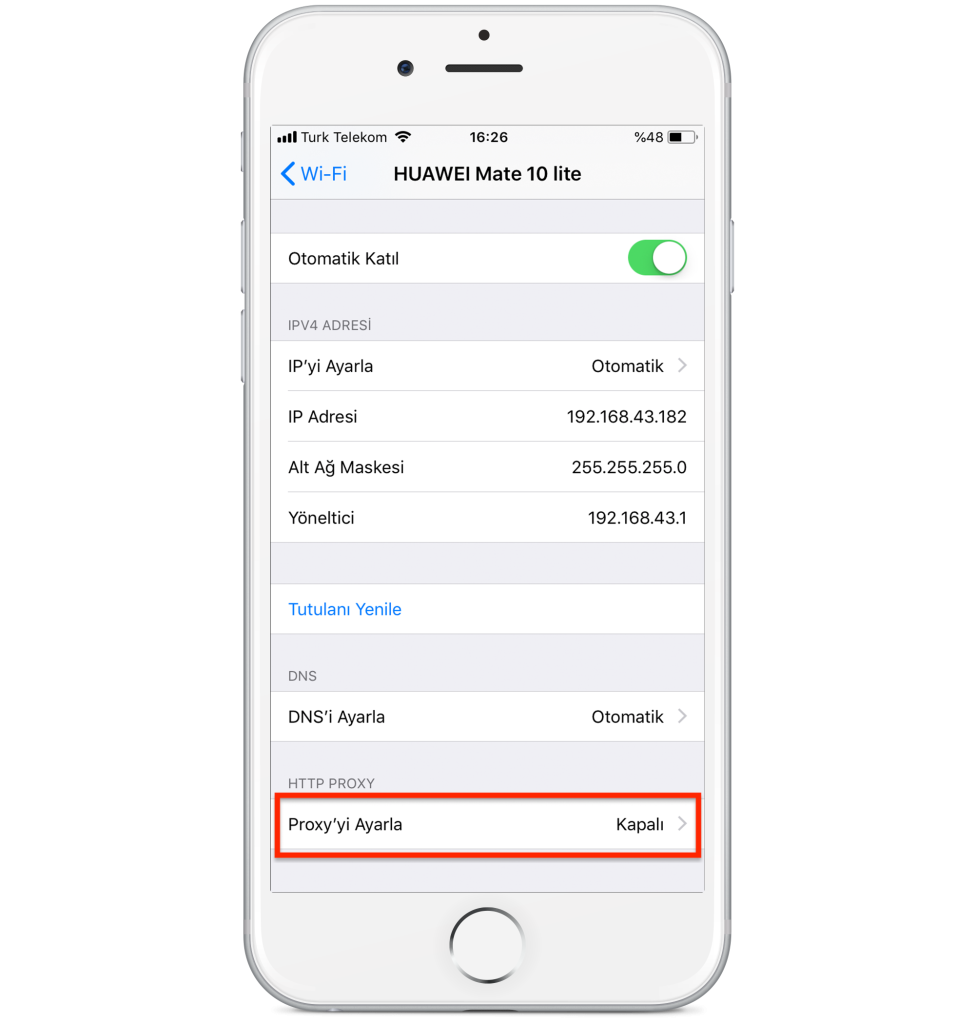
1) Go to Wi-Fi settings from Settings, then click on the letter “i”
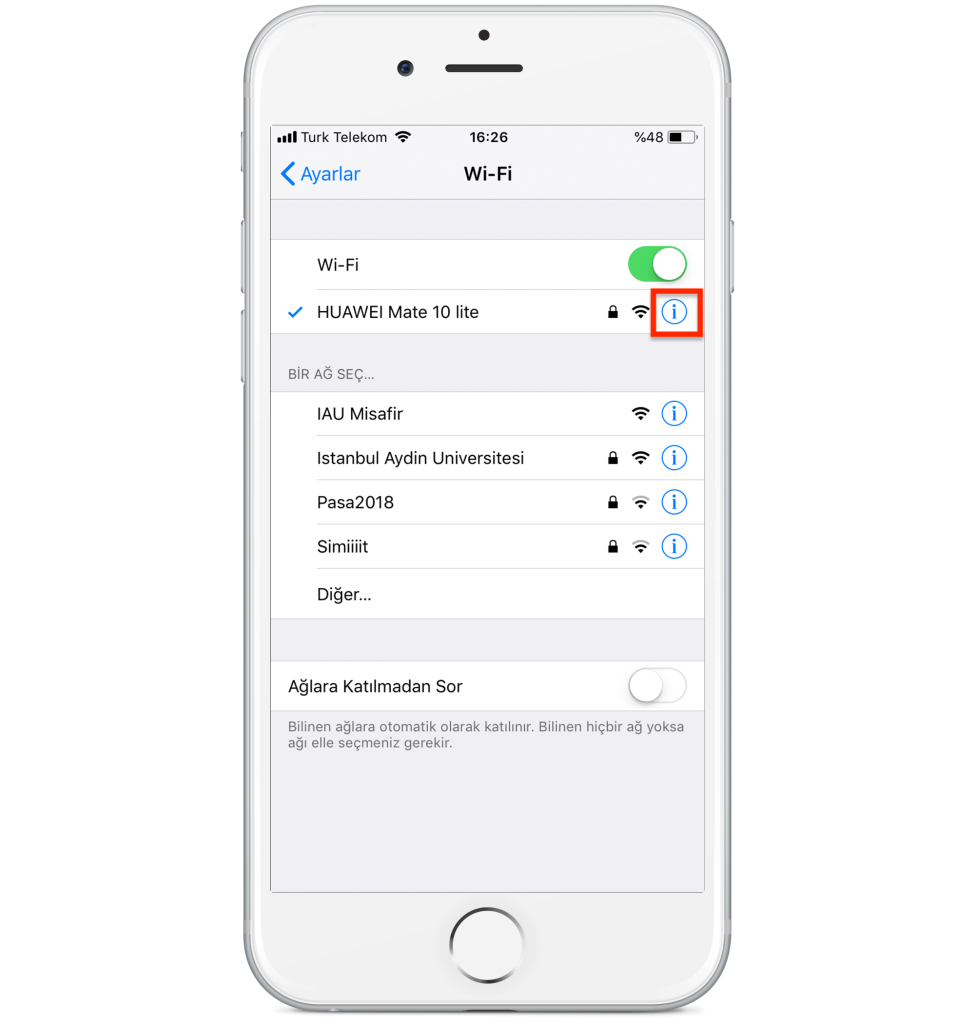
2) Click on the Set Proxy option which is in the closed position.
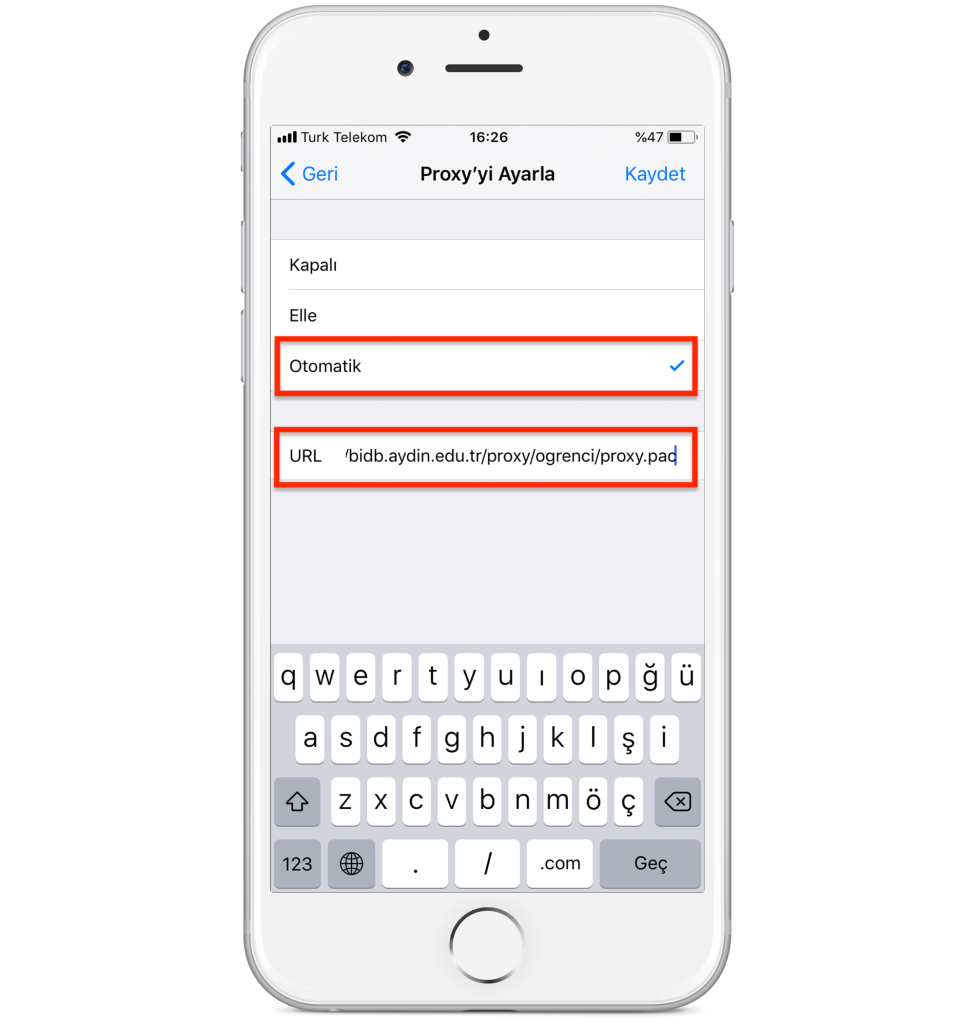
3) The proxy is set to Automatic and then in the URL section;
If you are a student
http://bidb.aydin.edu.tr/proxy/ogrenci/proxy.pac
address
If you are a staff
http://bidb.aydin.edu.tr/proxy/akademik/proxy.pac
address is entered
4) After the proxy setting is saved, when entering any database, a “Proxy Authentication Required” warning will appear on the screen. At this stage, click the “Next” button.
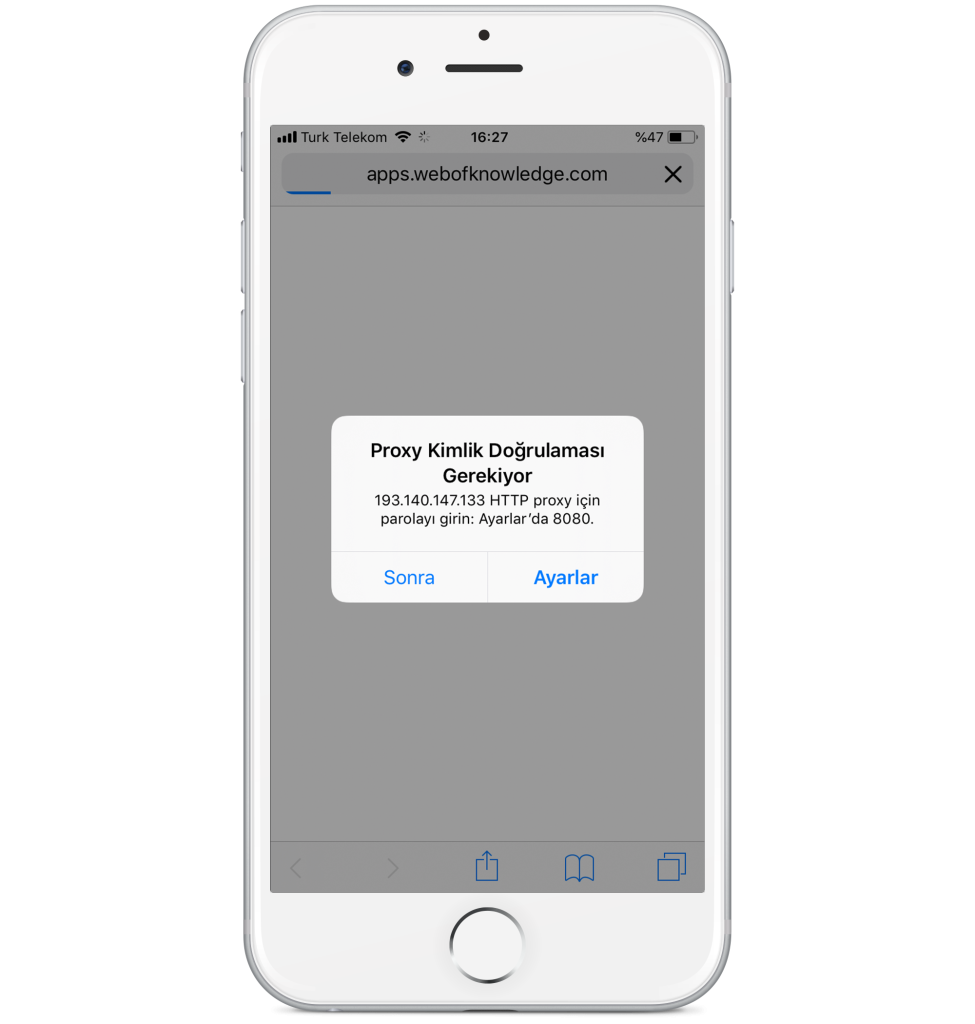
5) You must enter your institutional/student e-mail address and password on the username and password screen that appears on the screen.